Forms allows you to build the Forms that you need in your system, be they Dashboards presented at login, Forms for Equipment Requests or New Starters, Assets, Tasks or Contracts. Using drag and drop features you can quickly build the Form you need targeted to collect only the information required.
Click the links below to learn more information:
- Forms Overview
- Operation
- Activating Forms
- Component Forms
- Function Specific Forms
- Extra Fields within Forms
Forms Overview
HotH is a tremendously flexible tool that allows the capture of a range of information and the processing of that data within user defined workflow. Forms allows you to create Dashboards and Ticket Forms for different types of requests.
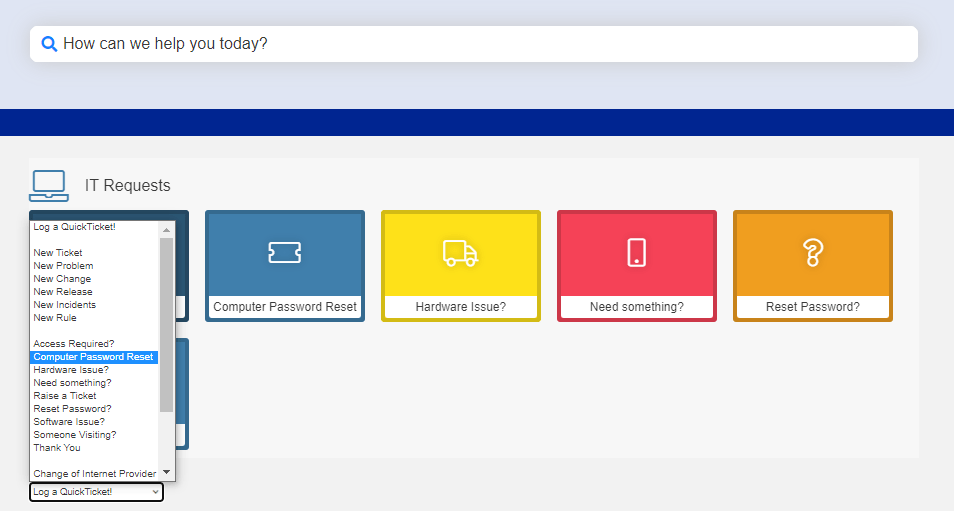
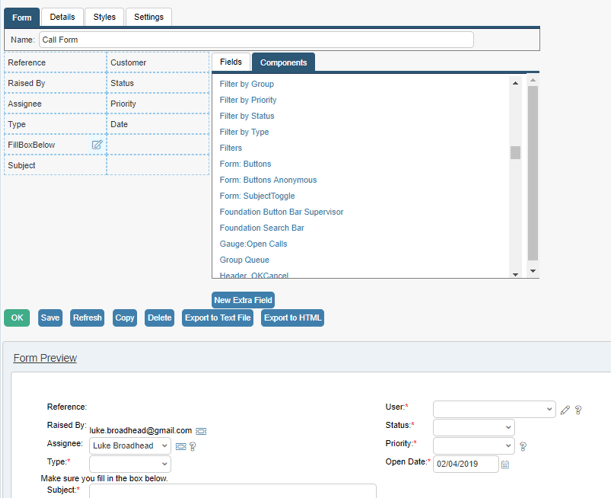
Below is an example of a Form:
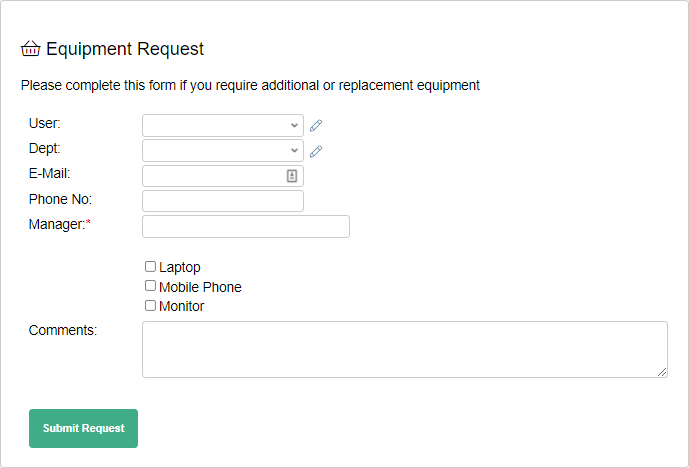
“Type” specific Forms can be presented for Assets, Tasks and Contracts, meaning that you simply ask for the data that is needed in that circumstance and ensuring that the correct data is recorded.
Forms – Operation
Prior to creating the Form there should be some planning to decide what the Form is to be used for and how that may impact HotH. Unless the Form is to be used with existing HotH fields then extra fields must be added through use of the “Fields – Extra Fields” function.
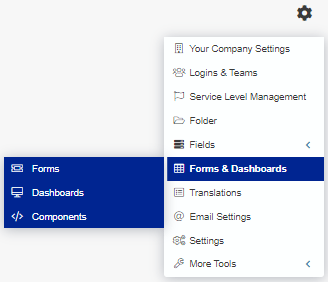
The Form summary is accessed via the Settings Cog > Forms and Dashboards:
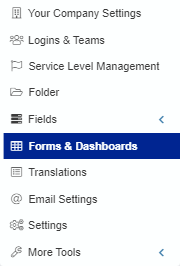
On selecting any of the Form types found on the Function Specific Forms Guide, you are presented with the Forms Summary screen showing existing Forms and an option Add ![]() a new Form.
a new Form.
There are certain naming conventions that have been adopted and which trigger fixed functionality within HotH. 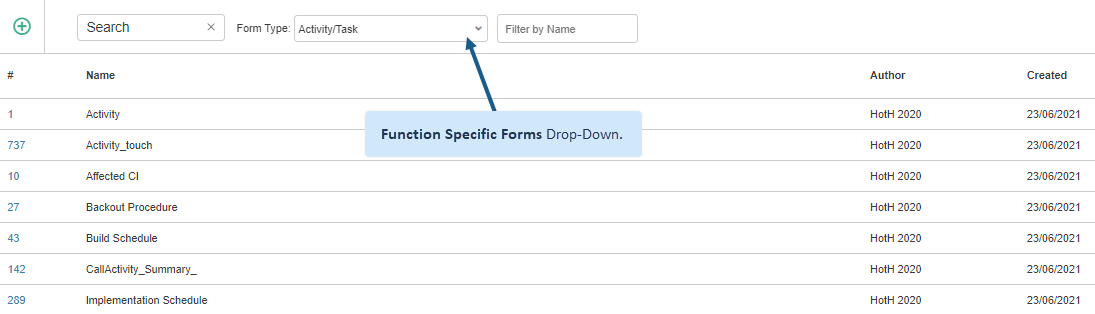
The Form Designer is common for all types of Forms and once mastered for one type of Form it can be used throughout. Clicking on Add ![]() you are shown the Form Design window.
you are shown the Form Design window.
An explanation of this is shown below:
If the Export to HTML option is used the screen will show the HTML and a display of the Form. The HTML can be directly edited but to see these reflected in the Form then Refresh must be clicked.

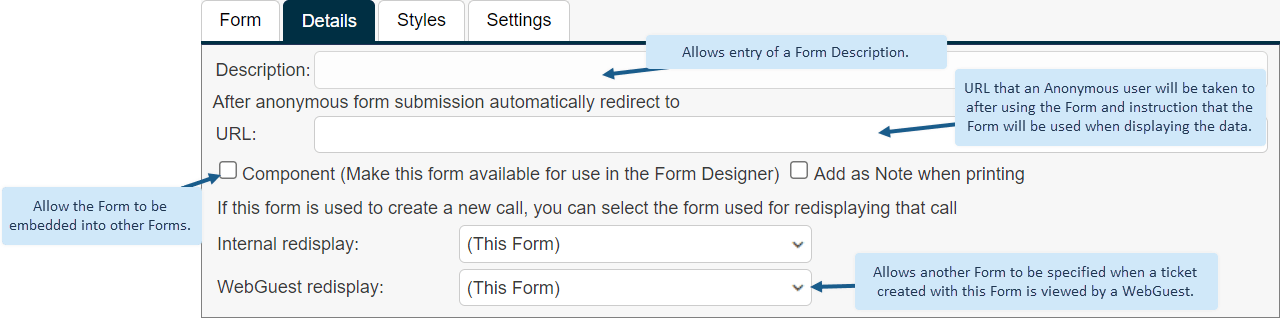
Details Tab
The Details tab of the Form allows entry of more information:
Styles Tab
The Styles tab allows direct editing of the Styles controlling the look of the Form. After editing or adding new style information you must select Refresh to see the working Form.
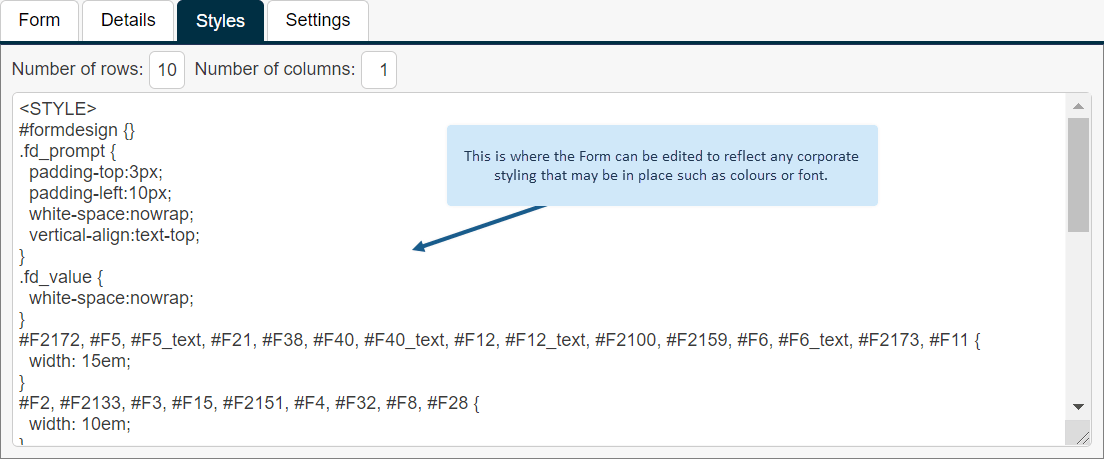
Another useful feature that can be applied in the Styles tab is the setting of the field prompt. By default the prompt will be taken as the field name but it is advisable to have short/reportable/meaningful field names and then use the prompt modification to set the prompt.
The example below shows the syntax of the script block that can be put at the end of the styles section. It shows the reference to the field number (eg. F10033) and then how the prompt text is set.
<SCRIPT>
document.getElementById(‘F10033_prompt’).innerHTML=’Who is the Booking For:’
document.getElementById(‘F10030_prompt’).innerHTML=’What Date is the Meeting:’
document.getElementById(‘F10031_prompt’).innerHTML=’What Time is the Meeting:’
document.getElementById(‘F10032_prompt’).innerHTML=’IT Equipment you need:’
document.getElementById(‘F10038_prompt’).innerHTML=’Where is the training:’
document.getElementById(‘F10048_prompt’).innerHTML=’What Date is the training:’
document.getElementById(‘F10050_prompt’).innerHTML=’What Time is the training:’
document.getElementById(‘F10053_prompt’).innerHTML=’How many laptops are required:’
document.getElementById(‘F10074_prompt’).innerHTML=’Contact details for External traininer:’
</SCRIPT>
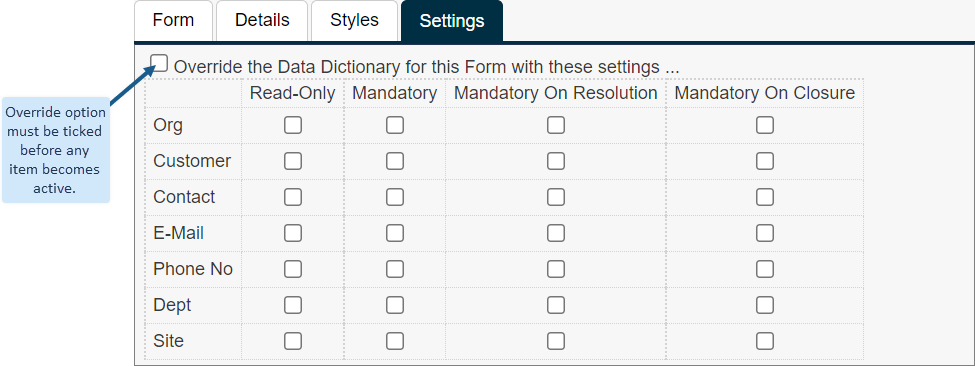
Settings Tab
The Settings tab allows the user to override the underlying dictionary settings on the fields in respect to the attributes shown.
Automatically Adding Tasks as a Form is Completed
Extra Fields where the Field Type is set to Checkbox appear on Forms as checkboxes. This can be used to build additional workflow into the ticket life-cycle via the creation of Tasks, at which point an automated email can also be sent to the Task Assignee.
This is accomplished by matching the Task Name and Extra Field Name. If that option on the Form is ticked then HotH will search for the Task which matches the name of the Extra Field and automatically adds that Task to the Ticket.

Using existing mail functionality on the Task would also allow for mail generation,
E.g. an Extra Field called ‘Task A‘, could match with a Task Type called ‘Task A‘ that is associated with a custom Task Email Template via the Task record held in Service Level Management.

Activating Forms at Folder Level
Once the Forms have been created there are different ways to make use of them. For Forms that are to be used in the main HotH Ticket screens, the Forms can be specified at Folder level on the Form maintenance screen (Settings Cog > Folder) where there are the options to specify the Form to be used by licensed HotH users or by end-users.
![]()
Tying Forms to QuickTickets
Special Forms such as “Equipment Request” or “New Starter” Forms are best utilised by associating them with QuickTickets.
This is covered in the following steps:
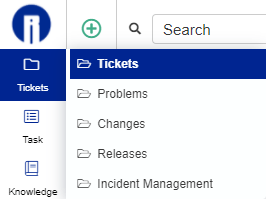
- From the menu select the required Folder:
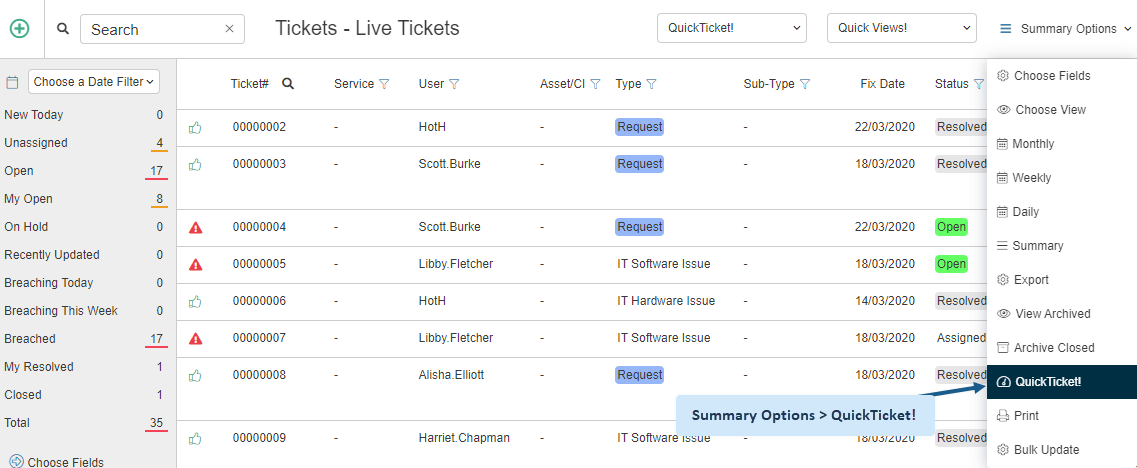
- Select the QuickTicket option on the right Summary Options drop-down:
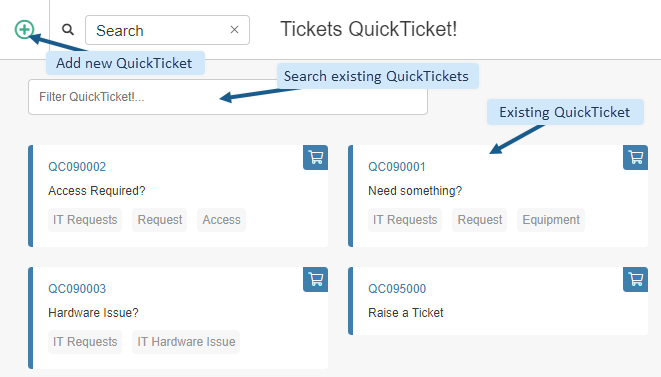
- Select Add
 or if the QuickTicket already exists select it:
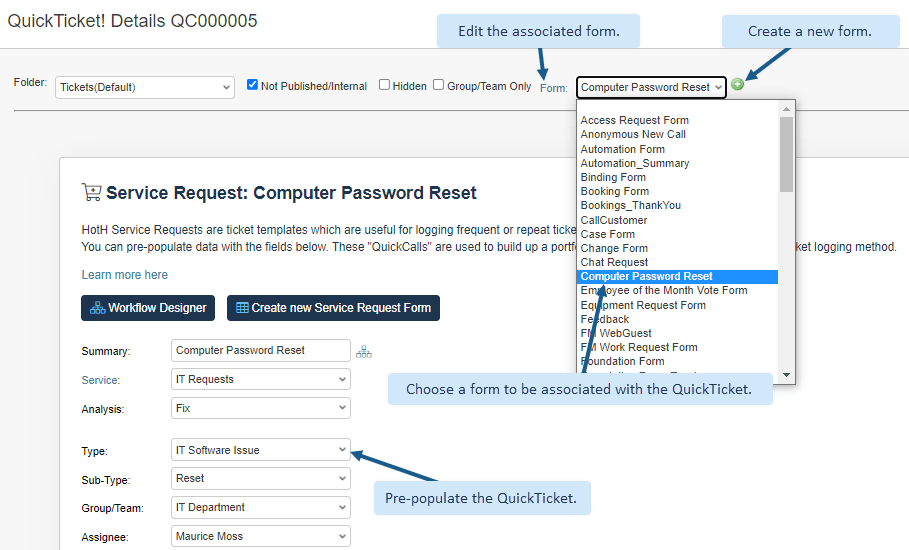
- Select the required Form from the drop down list or use the + option to create a new Form:
- The QuickTicket and Form are now available for your end-users though the Self-Service Portal
Component Forms
As a way of extending Form functionality use can be made of Component Forms. These are Forms that can be embedded within other Forms.
Go to the Settings Cog > Forms & Dashboards > Components:
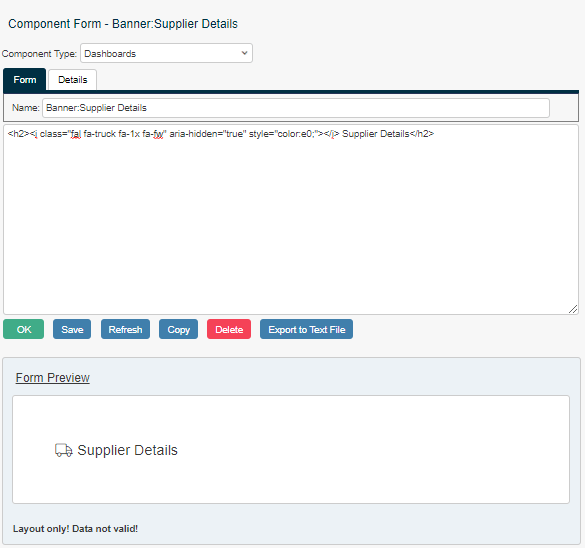
Click the Add ![]() button create a new Component Form. Below is an example of Component Form Banner:
button create a new Component Form. Below is an example of Component Form Banner:
On the Details tab of the Form the option “Make this Form available for use in the Form Designer” must be ticked.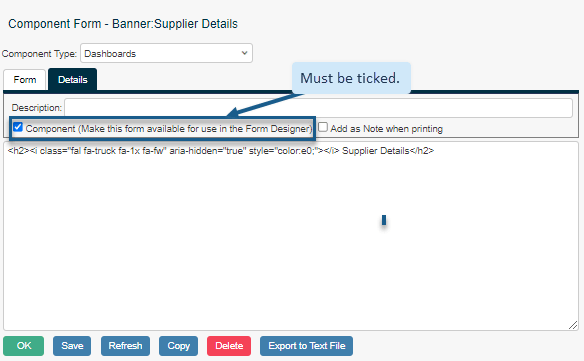
When used in the Form Designer the Component is dragged as any other field and rendered in the Form. In the example below the Component FillBoxBelow has been used to emphasise the field Subject.
Extra Fields within Forms
By their nature, Forms work with the fields that are available for the respective HotH record types. These fields are shown on the grid to the right of the Form development area.
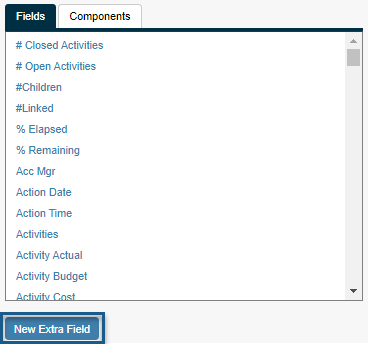
However, it may be that the Form needs to contain fields which are not represented. In this case there are two options:
- Where possible, try make use of fields that are available on the native table but are unused in the normal Ticket screen. For example, on the Ticket table there are several spare text, extra date and time fields that can be renamed and used.
- If all spare fields are already being used, then extra fields can be created for the table to which the Form is associated. Under the Fields tab, select the “New Extra Field” option
Once the main details of the field have been set there are some formatting options that can be applied to the specific field via the Settings Cog > Extra Fields:
- You can enter values in the Selection box and these will be shown as a drop-down.
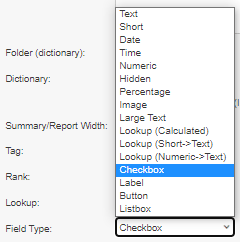
- If field type Date is set then a date selection will be automatically added next to the field.
- If field type Checkbox is selected the prompt will show in Checkbox format.
- If largetext is selected from the type then this should be accompanied by <TEXTAREA> in the Format field.
This in itself does not format the field on the form. If required this will need to be done in the Styles tab and the field size can be set .
The example below shows how the subject (F10), and solution (F43) fields are made larger.
}
#F10, #F43 {
width: 78em;
border-radius:0;
padding:10px;
border:1px solid #ccc;
}
textarea#F10, textarea#F43 {
height: 5em;
white-space: pre;
}
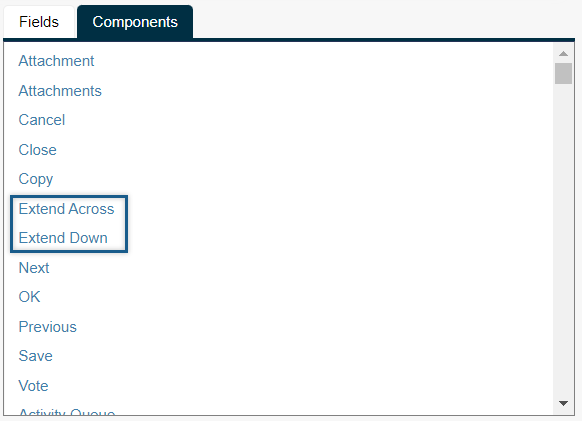
General Formatting of Forms
Within the design grid Components drop-down menu, there are the options of “Extend Down” and “Extend Across”. These can be positioned on a form to extend the number of rows or columns that are used by the adjacent field.
Still haven’t found what you’re looking for? Contact documentation@houseonthehill.com