HotH is highly configurable and offers the flexibility for you to set up the Change Management process to suit your specific requirements. The following guidelines focus on the “out of the box” solution provided within HotH. If you would like to alter this process please contact us about our Consultancy Services.
The default configuration consists of a pre-built Form, example categories and settings for fields on the form, and the Stage codes to support the three common Change Models.
Click the links below to learn more information:
Change Models
The Models supported are:
Emergency – Should only be used if something must be changed urgently to fix an incident.
Normal – Changes that are subject to CAB approval and which should be accompanied by supporting material to show that the risk has been minimised, a rollback plan produced, and a detailed implementation plan is available.
Standard – To be used for changes with an existing well documented procedure and which have been preapproved.
Workflows
Each Change Model initiates a specific workflow comprising of a set of stages codes. These are outlined below:
Emergency.
E.1 Planning
E2. Build
E3. Implement
E4. Review
E5.a Completed or E5x.Backout
Standard.
S1. Implement
S2a. Completed or S2b. On Hold
Normal.
This is the only workflow that includes an authorisation process.
N1. Planning
N2. Authorisation – this is the stage at which the Change requires authorisation or not.
N2. Authorisation (Accepted) or N2.Authorisation (Rejected) – and go back to
N3a.Build
N4.Testing
N5.Implement
N6a. Completed or N6x. Failure.
The authorisation process within the Normal Change Model uses the “Paperless Authorisation” whereby the nominated authorisers receive an email with the voting options of Authorise or Not.
There are more details on the authorisation process later in this guide.
The Change Folder
HotH uses a folder-based structure to differentiate between the type of Record; Incident, Change, etc. and as such Changes have their own folder.
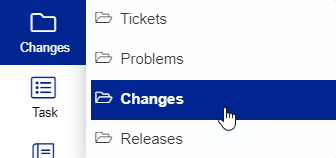
Settings on the Folder maintenance allow you to alter the behaviour or the process and naming conventions. It also associates the Change Folder with the specific Change Data Dictionary which allows customisation of field names and properties.
Access to the Change folder is controlled at a login level so before using is one of the first tasks is to decide who can have access. To learn about login management visit the on-line library pages on Logins.
The Change summary screen will show data according to the selected view.

Logging a Change
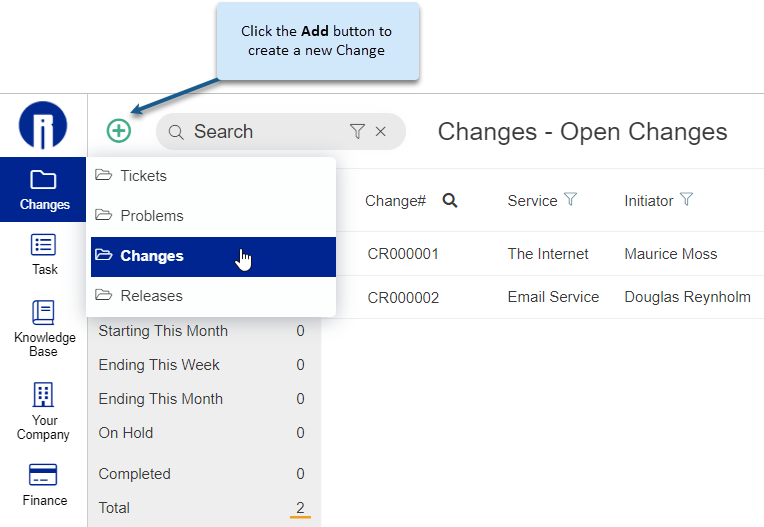
Navigate to the Change folder and click the Add button:
The default form for changes is shown below. Modifying this and other forms is covered here.
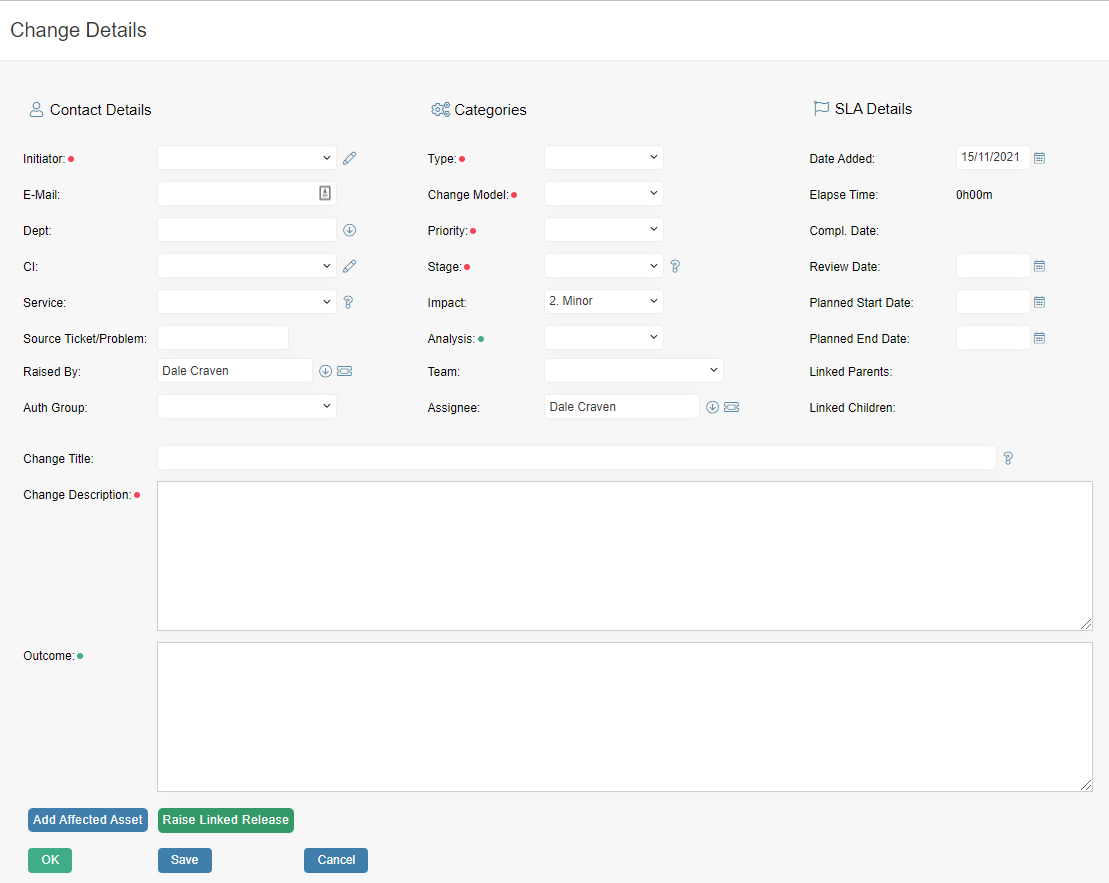
A brief description of each of these fields is provided below.
1. Initiator. Will offer a drop down of users on the system. (E-Mail and Dept will be pulled through from the user
record)
2. CI. Provides a list of assets. Intended to identify the key CI that this change may impact.
3. Service. Provides a list of Services and intended to identify the key service that this change may impact.
4. Source Ticket/Problem. Will be automatically populated if the Change has been raised from an Incident or a
Problem.
5. Raised by. Will automatically populate with the details of the person logging the change.
6. Type. This will define what kind of Change it is
7. Model. Change model to be used.
8. Priority. If a Change is Critical, Medium, Long Term etc.
9. Stage. Will automatically default to the first Stage for the pre-built workflow for the selected change Model. –
10. Impact. Whether the Change has a Major, Significant, minor impact on the business
11. Analysis. Closure category field primarily used for reporting.
12. Team. Can either default to a Team looking after Changes or be selected.
13. Assignee. Offers a drop down of assignees within the selected Team.
14. Date Added. Automatically completed.
15. Elapsed time. Tracks the open time of the change
16. Compl. Date. Automatically completed once the change is closed.
17. Review Date. Manually entered for the target review date.
18. Planned Start Date. Manually entered.
19. Planned End Date. Manually entered.
20. Linked Parents. Can be used if integrating with Release Management
21. Linked Children. If the change has been raised from a Problem this will show the Problem Reference
22. Change Title. A short description of the Change for reporting and summary purposed.
23. Change Description. A more detailed description.
24. Outcome. A summary of the eventual outcome of the change.
The fields that are mandatory on creation or completion of the change are controlled through settings on the Form.
Depending on the Model Selected the starting Stage will be set to a preconfigured stage code which is the starting point of the Workflow for that model.
These are:
S1.Implement for Standard Model.
N1.Planning for the Normal Model.
E1.Planning for the Emergency Model.
It is at this initial point that the system can/will add Tasks to the change. In the context of the Change Process, these are associated jobs that must be completed before the Change can progress to the next Stage.
The library of tasks that should be considered “New Change” tasks consists of :-
Backout Procedure.
Build Schedule.
Implementation Schedule.
Risk Assessment.
These can be either added automatically to a new change or associated to the first stage of each Model and be
added selectively. The default package adds selective Tasks as listed below.
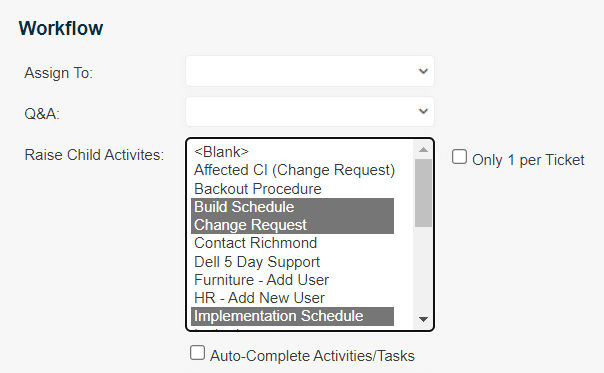
Planning will also add subtasks to the Change. “Backout Procedure” and “Build Schedule”.
N1.Planning. will also add subtask to the Change. “Backout Procedure” and “Build Schedule”, “Implementation
Schedule” and “Risk Assessment”
S1.Implement does not add any subtask given the nature of Standard Changes which should have pre-existing procedures.
It is a simple job to amend which tasks are automatically added at this initial Stage by amending the “Raise Child
Activities” in the Stage settings in Service Level Management
After the initial change is logged any tasks added are shown in the Tasks Tab at the bottom of the Change Form.

These tasks must be marked as complete before the Change is moved to the next stage and serve as a way of forcing the collection of the information required before the CAB are asked to assess the Change.
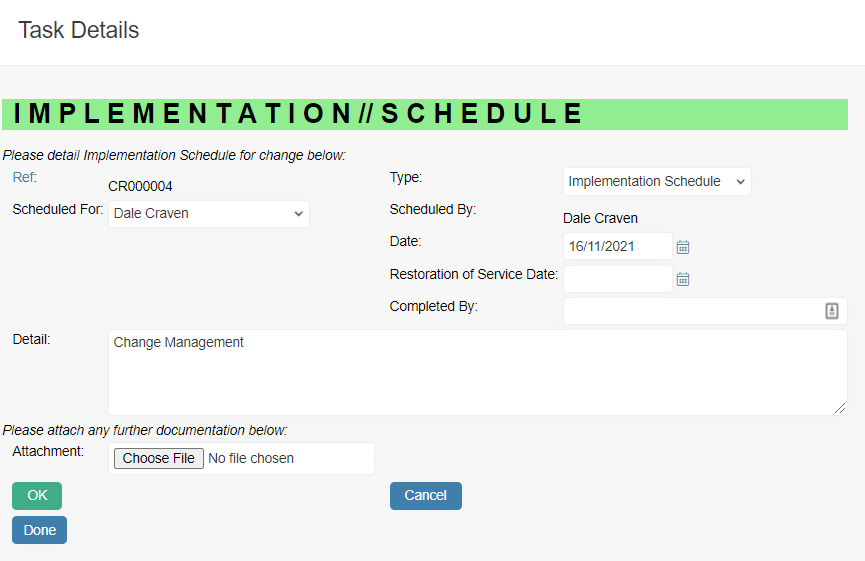
Information can be added to each task by clicking on the row and filling in the Details on the offered form and clicking Done.
Authorisation
A change is progressed by filling in the required information and progressing the stage along the offered workflow. It is only the Normal Change workflow however that has a stage that allows for Authorisation.
In the default Solution the Authorisation stage N2.Authorisation is set with the “CAB” as the authorisers and the setting is that all those invited to authorize must authorize for the change to progress.
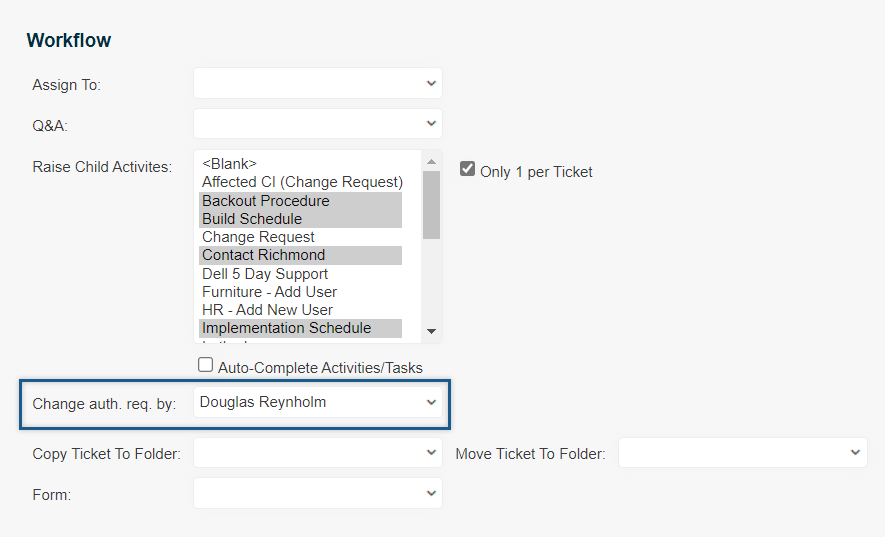
Logins have to be added to the CAB Group using the Resource Allocation feature.
Once the change is moved to this stage all users in the CAB are automatically emailed a “voting” email advising them that a change needs authorising, providing a link to the change, and with a summary of the change.
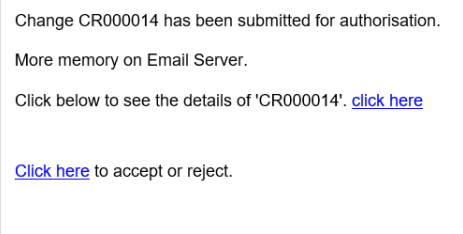
Clicking on the link to Accept or Reject shows the form below.
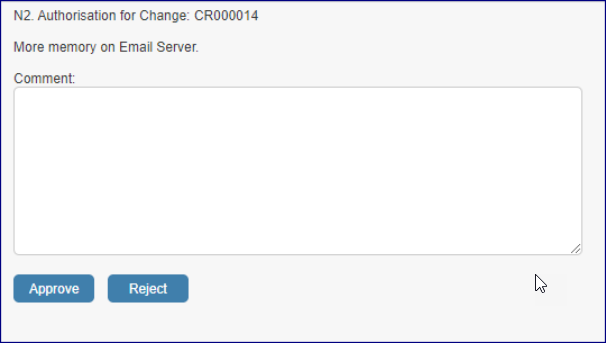
The system is set to reject the Change if any one of the authorisers rejects the change. Comments added to the form will show on the Task on the Change.
As per the workflow for Normal Changes this Change would automatically be moved to N2.Authorisation(Rejected) from where it can either be recycled if the change needs to be resubmitted, or closed off.
If all the authorisers Approve the change it will automatically move the stage N2.Authorisation (Accepted) and can be moved to N3a.Build and the change can then progress down the workflow of stages.
Change Dashboards
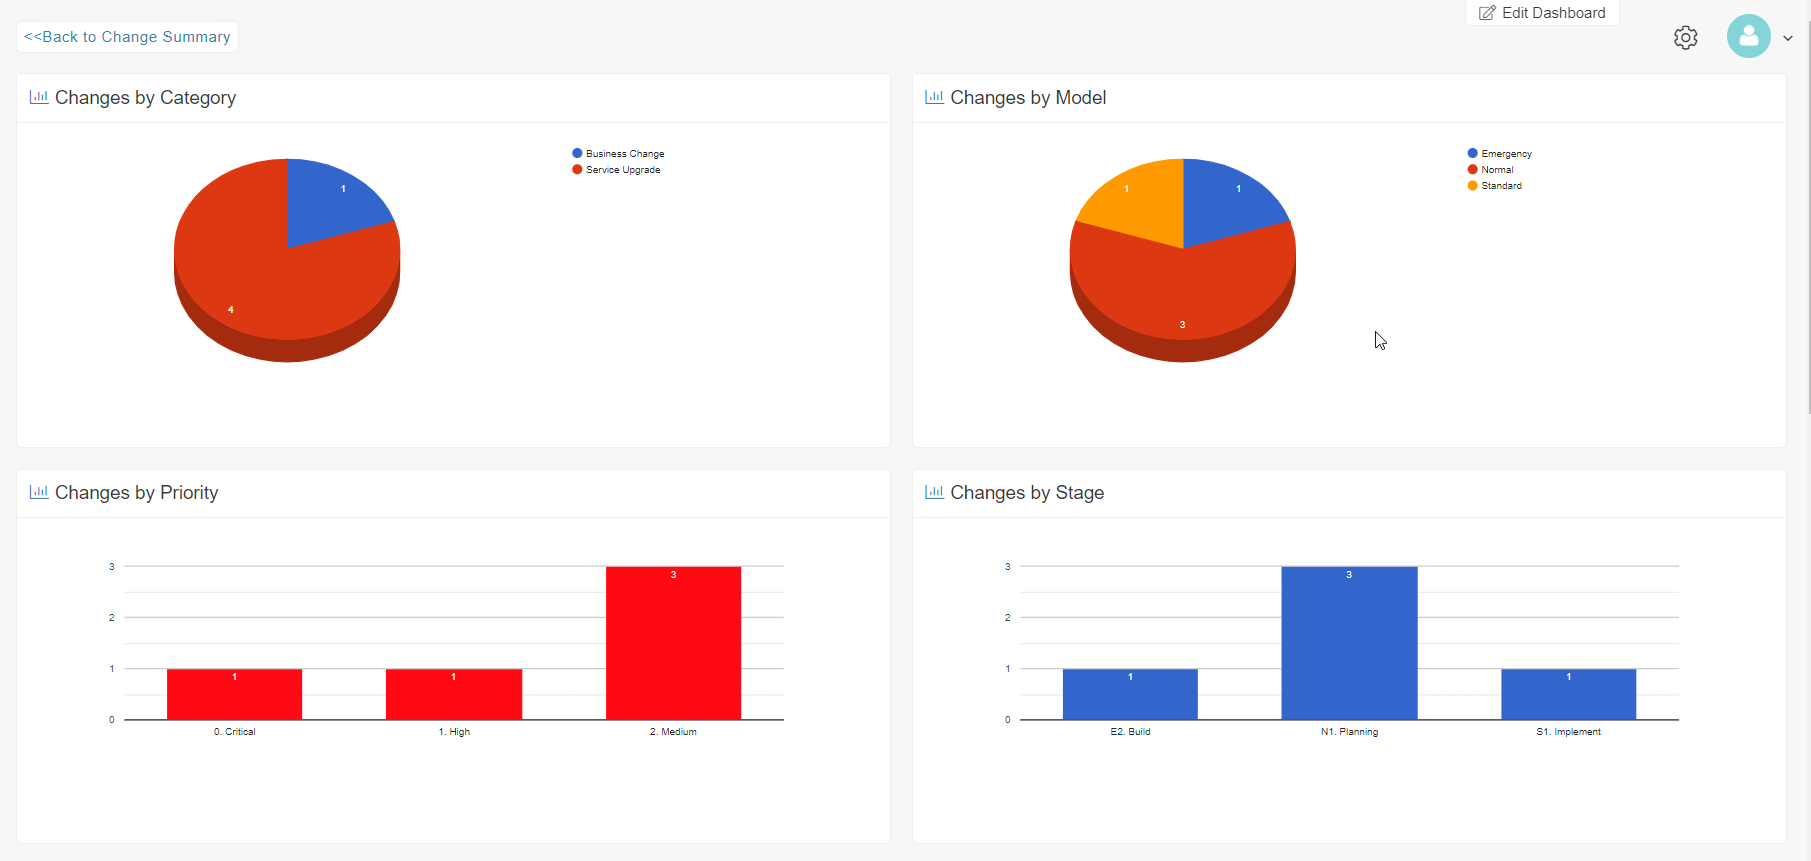
Using the Report Writer any number of reports can be written to provide both summary and detail of the stage of current changes or historical trends. This is an area that is simple to modify using the Dashboard builder.
Changes can also be viewed from a calendar perspective using the Change Schedule button:
![]()

With the colour of the date area indicating the status of the Change and the coloured area representing the planned Start – End dates
Still haven’t found what you’re looking for? Contact documentation@houseonthehill.com
Back to Top
Previous – Problem Management


