Installing the Software
- Assuming the software has been downloaded, simply run the downloaded *.msi file (first – please ensure the file is not blocked after download by right mouse clicking the file, Properties, click the Unblock button if present).
- The Welcome dialogue box appears. Click Next > to continue.
- The Destination Folder dialogue box appears. Enter the path for the HotH installation directory. You can use the Browse button to select the Folder. Click Next > to continue.
- The software will copy the appropriate files to the destination folder, as well as configure your system to use HotH.
| IMPORTANT: You do not need to install the software on each client machine – please read on for more information on configuring clients. |
If you have any client machines which be running the Windows UI version of HotH, then you need to share the HotH installation directory across the network so that users can access and run the application. By default, the installation directory is created with a ‘full control’ permission for everybody. This is because directories and sub-directories will need to be created by the users when an action such as adding an attachment to a call is performed. HotH will copy these files into sub-directories on the server, so that they can be accessed by all users. You may amend these permissions post-installation whilst taking into consideration the requirement for users to have write permission to the attachment sub-folders.
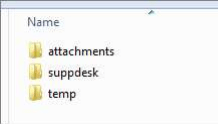
The default settings will install SupportDesk to C:supportdesk. The contents of the installation directory will looks something like this:
Still haven’t found what you’re looking for? Contact documentation@houseonthehill.com


