Upon logging in, you are presented with the home dashboard, which provides an overview of the current situation on the service desk alongside navigational icons and links.
We’ll be using tickets in this section about Views, but the same rules apply to all record views in House-on-the-Hill.
The page below describes how you can manipulate the record list so that it shows what you want and also how to save the results for future use.
Click the links below to learn more information:
- Selecting Fields
- Using the Search Box
- Using the Advanced Search
- Saving Views for Future Recall
- Deleting Views
- Saving a Default View
- Saving a Private QuickView
- Sorting on Fields
- Calendar View
- View Archived Records
Selecting Fields
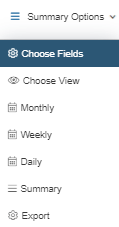
You can select the fields to display by clicking Summary Options > Choose Fields:
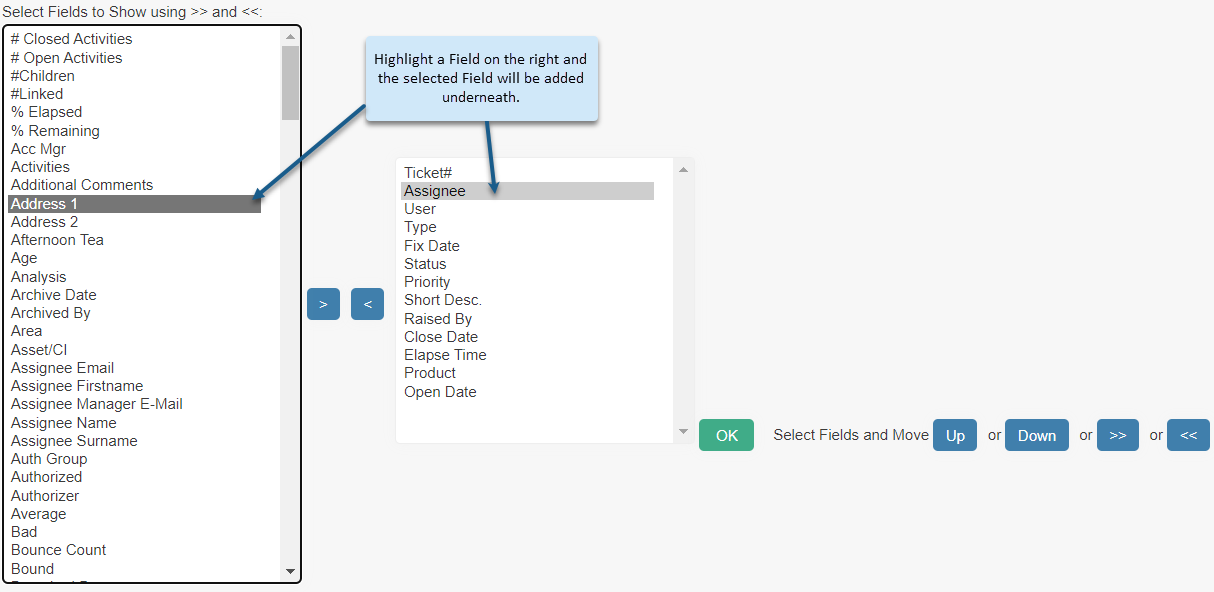
This will display an alphabetical list of fields available (left hand column) and those already selected (right hand column). In the left hand column, highlight the field you wish to add. In the right hand column, you can specify where in the view you want it to sit by highlighting the field that you wish the new field to sit next to. Use the > and < chevrons to move the fields to and from the list of those available and those selected. Use the >> and << to move all fields simultaneously.
Clicking OK will save your field selection, and then your new field will be included in the summary view:
Using the Search Box
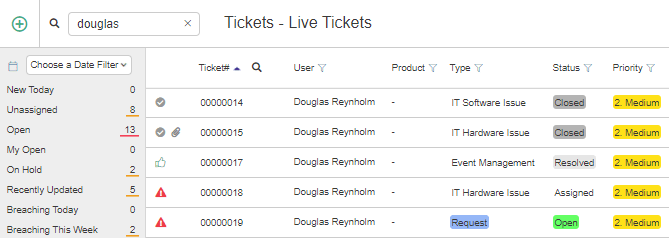
The search box is a free-text field in which you can search the Record list that you are currently viewing, using any entered search terms. Pressing enter after typing a search term will bring up all records in the list that include the search term. You may want to search for all tickets related to a specific person for instance.
Using the Advanced Search
In the Search field in the ticket summary, you will see a filter icon:
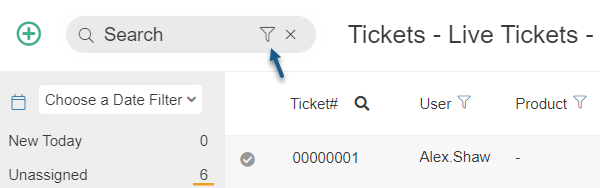
Clicking on the icon will bring up the advanced search screen:
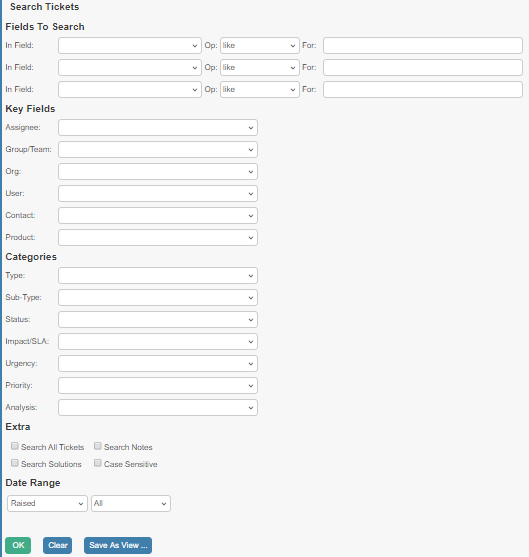
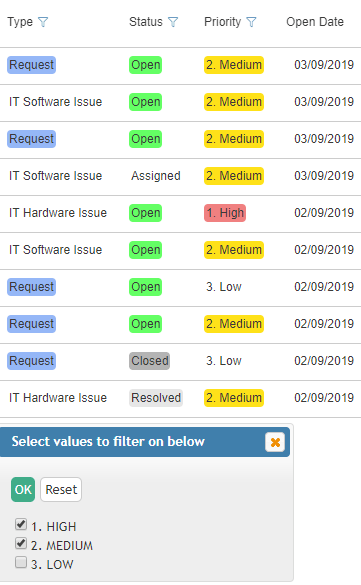
This screen can be used to create refined searches that include multiple parameters and search terms:
- The top 3 ‘In Field’ search boxes have a dropdown of all fields on the ticket screen.
- The Op. selection allows you to pick whether the system searches for something similar to, equal to, lower than etc. what has been entered in the ‘For’ field.
- The ‘For’ field lets you enter any search term and is a free text field.
- Then the Key Fields and Categories allow you to refine your search further, with the Date Range drop-downs enabling the selection of Open, Closed, Raised tickets etc. You can also select custom date ranges by clicking Dates, then entering the specific dates.
Saving Views for Future Recall
If you have created views using the Selecting Fields, Search Box, or Magnifying Glass methods and wish to save the view so that you can easily return to it in the future, there are various options for how this can be saved and accessed.
Firstly, it is possible to save the view as a QuickView favourite. This means that it will be accessible by all of your team that log in HotH. This is useful if there are views that need to be shared by multiple teams or users.
In order to save the view as a QuickView favourite, first create the view using the directions from the methods mentioned above.
Then, from the ticket summary screen, click the Save View button to save your custom view.

Clicking this will then take you to the Save View screen. Here, you can enter the name that you would like the View to appear as, then select the tick box QuickView Favourite and click Save.
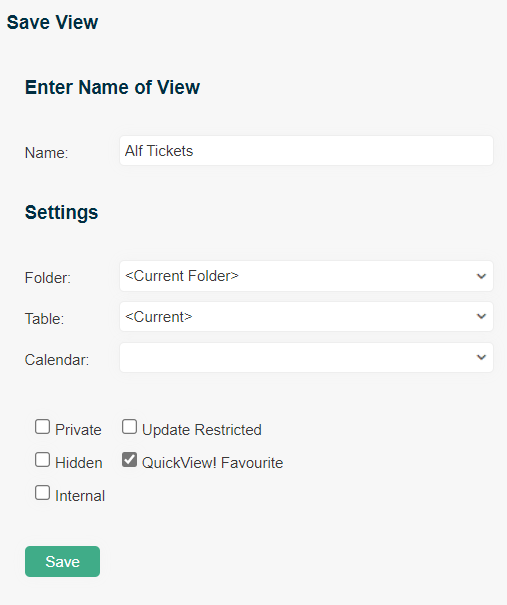
Now, “Alf Tickets” will appear in the QuickViews drop-down, and the selection of the view will instantly display the pre-set parameters. Using this drop-down means that you can navigate between different views instantly, and you can save as many QuickView favourites as required.

Deleting Views
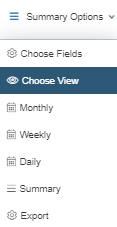
To delete a View, when in the ticket summary, navigate to the Summary Options > Choose View.
Select the View to delete in the following window and click the Delete button:
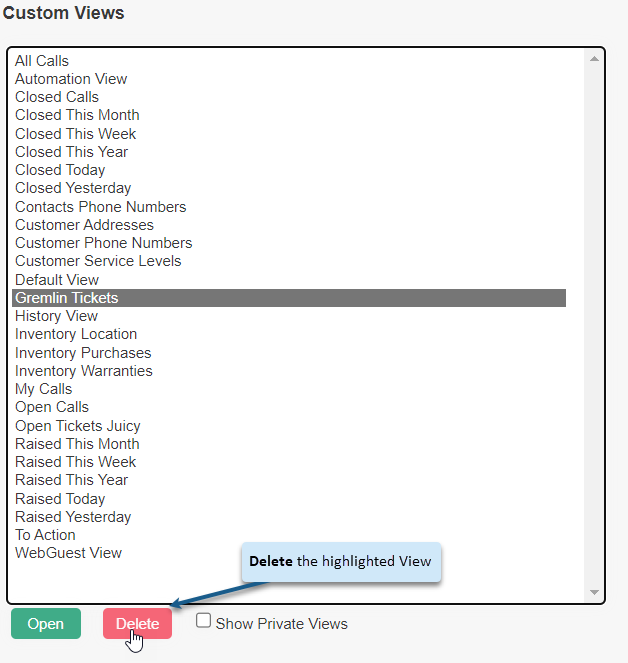
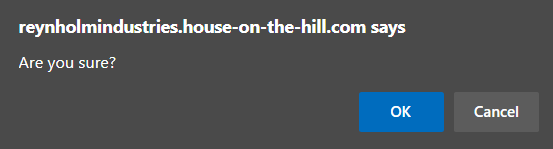
Click OK in the pop out to delete the View:
Saving a Default View
If you wish to save a view as the default view for a specific user, so that on logging in to the system this view is generated, you can do this via the Login privileges.
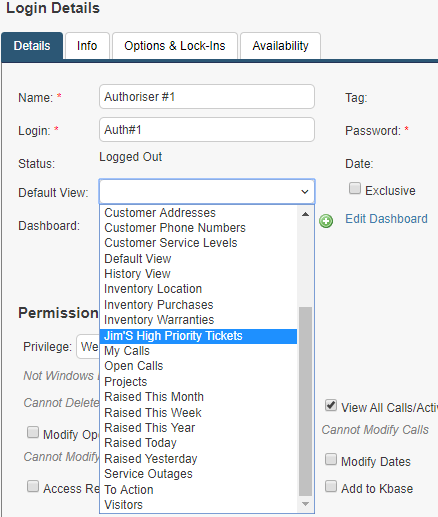
On the Web Interface, go to Settings Cog ![]() > Logins & Teams, and click into the user that you wish to set the default view for. Then, you will see a drop-down named Default View. In this drop-down will be the custom views, and any QuickView Favourites you have created. Select the view and click OK to save.
> Logins & Teams, and click into the user that you wish to set the default view for. Then, you will see a drop-down named Default View. In this drop-down will be the custom views, and any QuickView Favourites you have created. Select the view and click OK to save.
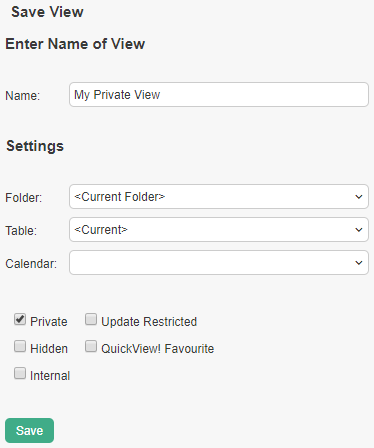
Saving a Private QuickView
You can also create a QuickView that is private, meaning that this can only be accessed via logging into the profile of whoever has saved the private view. The same steps should be followed as for creating the QuickView Favourite, but instead of selecting this tick box, the Private tick box should be selected:
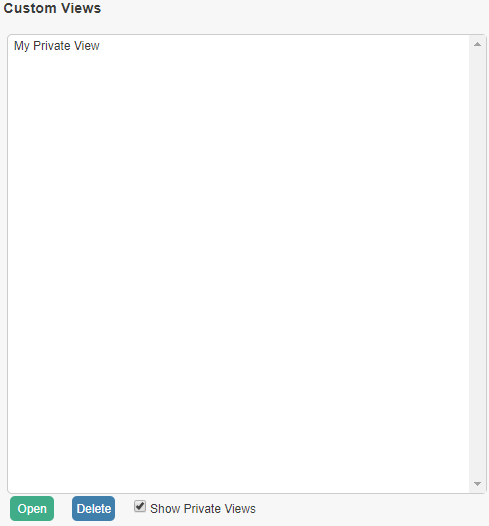
You can then access your Private views by clicking on Summary Settings > Choose View:
This will bring up a list of all the custom QuickViews. You can toggle between these and your own Private views using the Show Private Views tick box at the bottom of the screen:
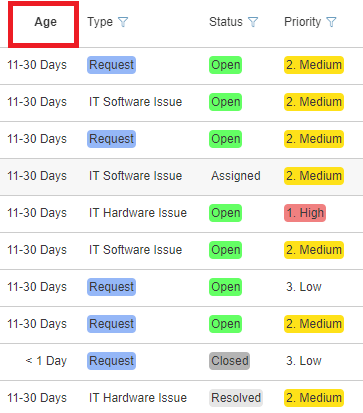
Sorting on Fields
In order to alter the display of tickets in the work queue so that certain fields can be sorted alphabetically or numerically, simply click on the Filter Icon “![]() “. In these examples, lists have been sorted on Priority:
“. In these examples, lists have been sorted on Priority:
Calendar View
House-on-the-Hill has two options for viewing the tickets that need to be actioned. We have looked at the standard work queue view which displays colour coded tickets when SLAs are breached.
The calendar view can be accessed by navigating to Summary Options > Monthly/Weekly/Daily in the top right of the ticket screen. This displays an overview of the days on which Action times are set. The Orange blocks notify that the tickets listed in the left hand column are still open and will breach its action date on this day:
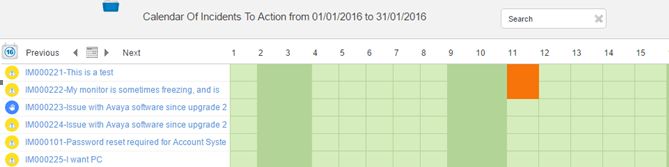
The orange blocks are drill-down links that take you straight through to the call.
View Archived Records
Use this option to list records that have been archived. Records other than tickets can be archived by ticking the Archive box. Closed tickets can be archived by a Supervisor login using the Archive Closed Tickets entry on the Database menu.
Archived tickets can only be viewed and not updated. Supervisors can transfer closed tickets back to the live using Restore Closed Tickets entry on the Database menu. Un-ticking the Archive box can restore other record types.
From within the ticket list view, you can click on the ‘View Archived’ via the Summary Options drop-down. You will then see a view of Archived tickets. To get back to the live ticket list, click View Live.

Still haven’t found what you’re looking for? Contact documentation@houseonthehill.com