Notes can be added to tickets providing a communication channel for engineers/agents working on service desk tickets and for Customers wishing to contact agents directly.
Click the links below to learn more information:
Adding Ticket Notes
Notes automatically records the date and time of creation, the note Author and the Status of the ticket at the time the Note was written. The Notes tab sits at the top or bottom of the ticket screen, and provides a full chronological audit trail.
Manual Notes

Internal Notes
When adding a manual note, the decision can be made as to whether to keep the note as an internal message, so that only support staff can view it. Alternatively, you can enable Customers to view notes on tickets logged via the self-service web portal, in order to provide an additional communication channel and a level of transparency. This is controlled by the Internal tick box, and when selected, the note is Internal. Notes default to being Internal on creation:![]()
If the Internal tick box is selected on the ticket note, the note will be hidden from the Customer (End-User). If the tick box is deselected, the Note will be visible on the ticket when viewed by the Customer via the self-service portal.
Important Notes
HotH enables Notes to be flagged as Important by support staff so they are instantly identifiable.![]()
Once the Important tick box is selected on the Note, the Important sign is displayed next to the Note in the Note trail on the ticket:![]()
Ticket Note Functions
Note Details
The Note displays relevant information at the top of the screen:
![]()
Function Buttons
Function buttons are automatically generated based on the Customer, Assignee and “Raised by” details:
![]()
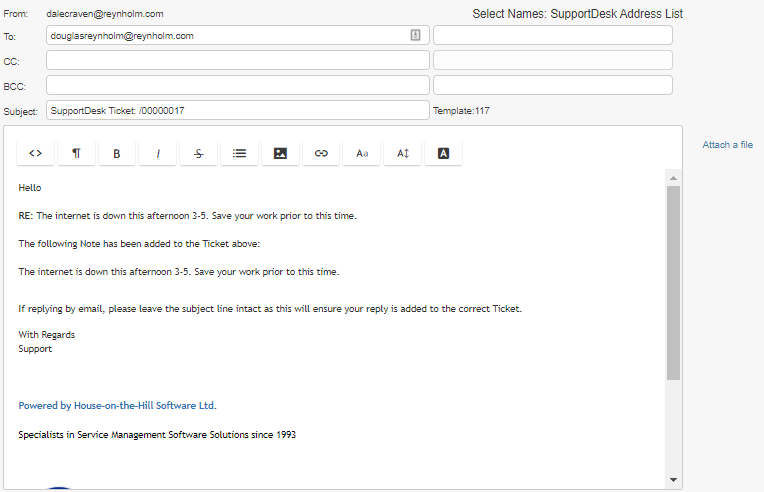
When clicked, the email template is automatically generated with the correct recipient in the To Field, and the Note details in the email body. If Pause Before Sending is enabled on the email template, then the mail can be edited before sending:
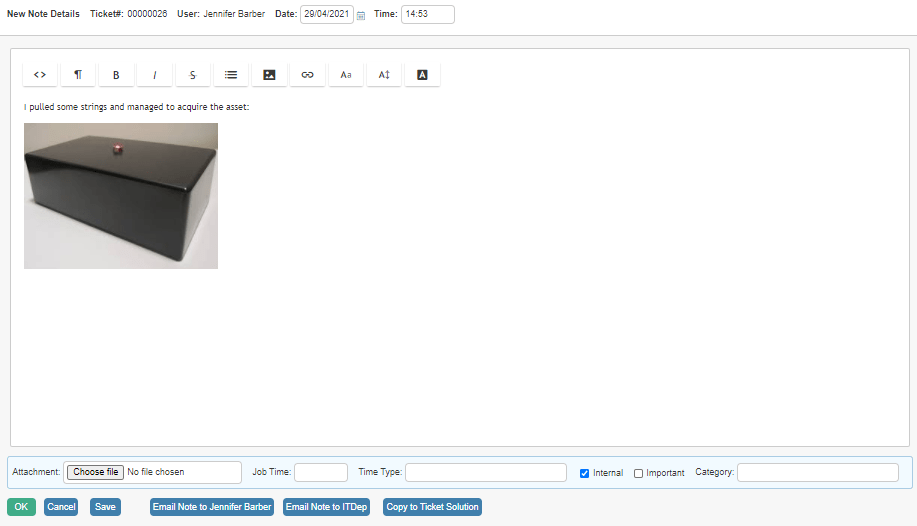
Copy and Paste Images into Notes
To copy and paste into Notes, Agents or Customers can simply click on the Note and then paste the image using either right-click or Ctrl+V:
WebGuest Update Feature
A query we often receive is how best to alert staff when the WebGuest (End-User) has added a new note to a ticket. HotH has features to assist with this, such as the automatic email “On New Ticket note to assignee”, and the envelope icon that appears in the ticket summary border.
However, HotH provides another feature, the ‘WebGuest Update’, that can help automate the process and progress the workflow on a ticket.
Overview and Setup
The WebGuest Update feature allows a status to automatically move onto another status (the ‘Child Category’) when either:
- A new Note is added to the ticket by a WebGuest
- A new Note is added to the ticket automatically by an inbound email
This requires two flags to be set on the (first) status you would like the ticket to change from.
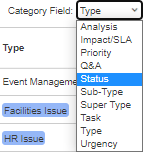
Firstly, navigate to the Settings Cog ![]() > Service Level Management, then change the Category Field drop-down to be set to Status:
> Service Level Management, then change the Category Field drop-down to be set to Status:
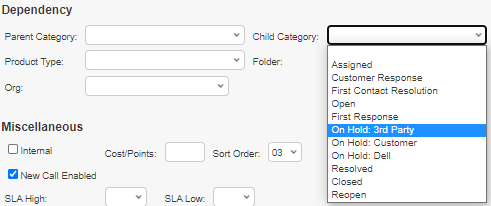
Choose the Status from the summary which you would like to edit and then in the Dependency section set the Child Category you would like the ticket to change to:
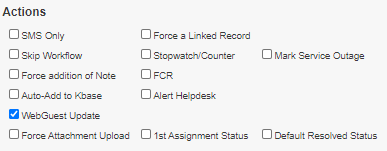
In the Actions Section of the Status Configuration panel – tick the WebGuest Update box.
Operation
In the example above we have created a new child category “On Hold: 3rd Party”. The WebGuest update flag has been set on a status “Waiting for Information” which would typically be a status code that tickets are designated when awaiting feedback from an end user. So, tickets sitting on status “Waiting for Information” will automatically be moved to “Information Received” under either of the conditions listed in the overview above.
In addition you could configure an “Email to Assignee” on the resulting status, or make sure that this status is included in the default view of tickets that staff are using. For added emphasis the status could even be attributed a specific colour.
Another use of this may be to flag the Closed status as “WebGuest Update” and give it a child status so that notes added to closed tickets are not missed.
Still haven’t found what you’re looking for? Contact documentation@houseonthehill.com